square area settings
Square area settings
The settings for the display of the square area can be found in the Text options... menu panel whilst customising your plan. .
First, select a plan from your list select a plan on your account - note that the watermark needs to have been removed:

To access the square area settings, select a plan on your account and then tap on Get 2D.
You will now see a screen similar to that shown below:
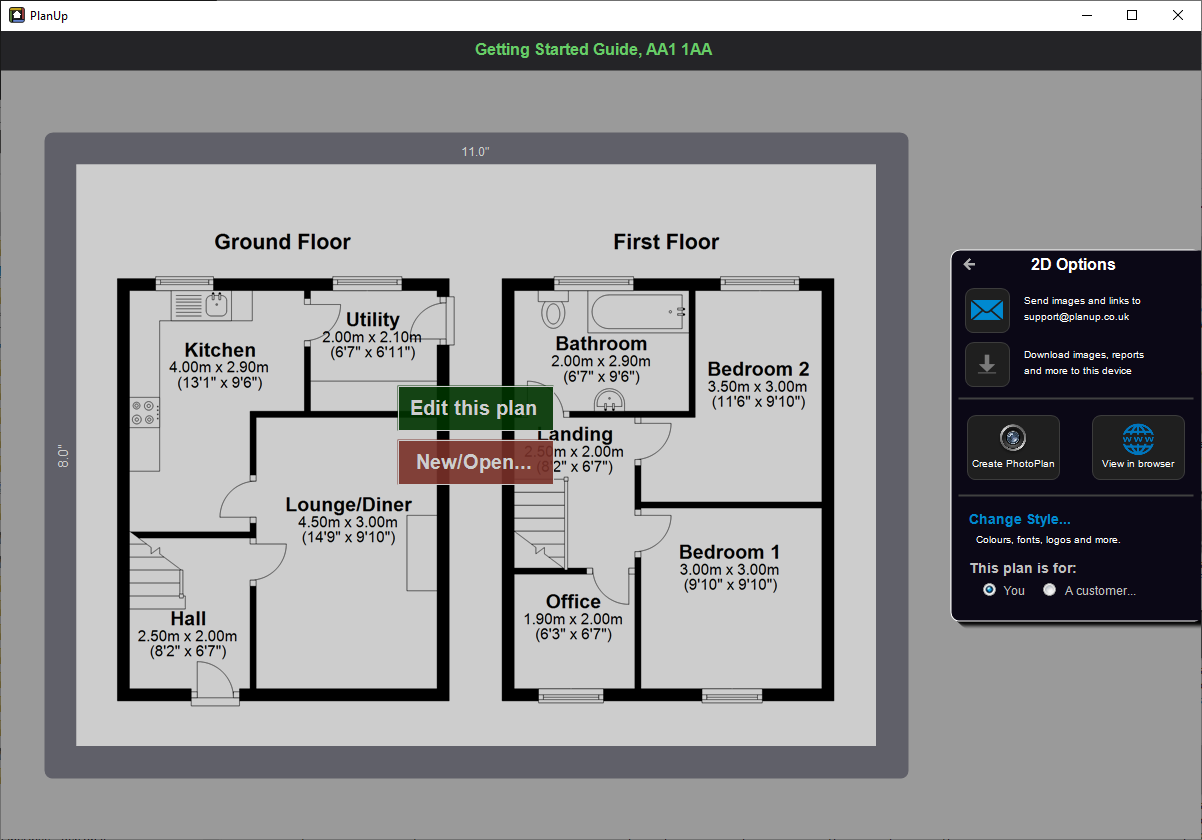
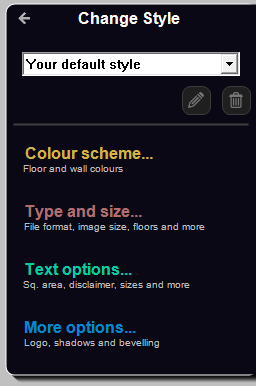
Now tap on Change Style... and then Text options..., the menu panel on the right will change like this:
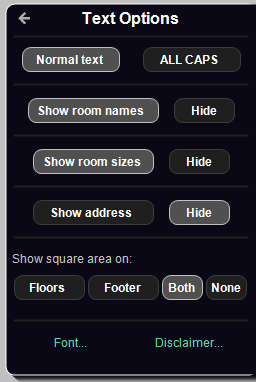
towards the bottom of the menu panel, you will see options to Show square area on:
- Floors: This shows the individual floor square areas only.
- Footer: This shows the grand total at the bottom of the plan.
- Both: Shows both the floor areas and the grand total
- None: No square areas are shown at all.
Choose as required and then continue with your next steps.