
saving final images and other outputs
Saving final images
Once you have finished drawing the plan tap on the Finish icon on the bottom toolbar, then enter the address and tap on OK.
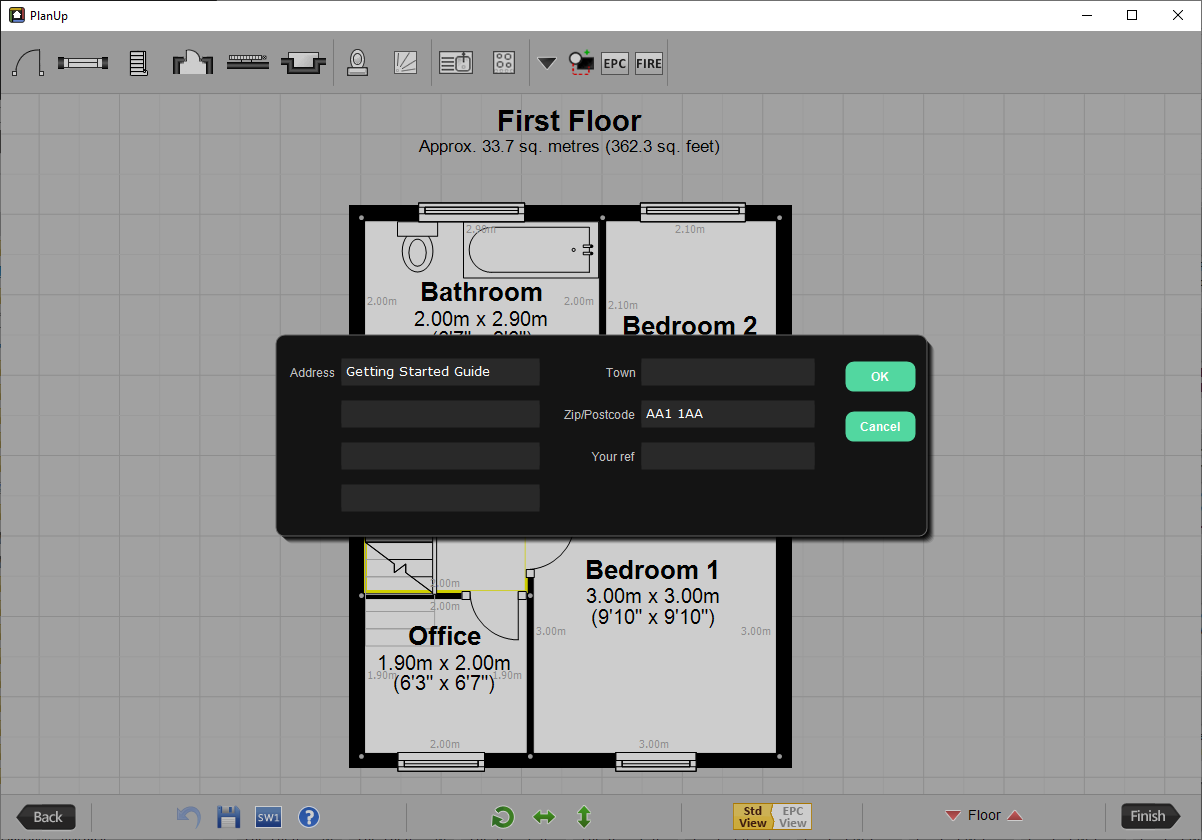
If you are not already signed up to a subscription with PlanUp you will then get to a screen like this:
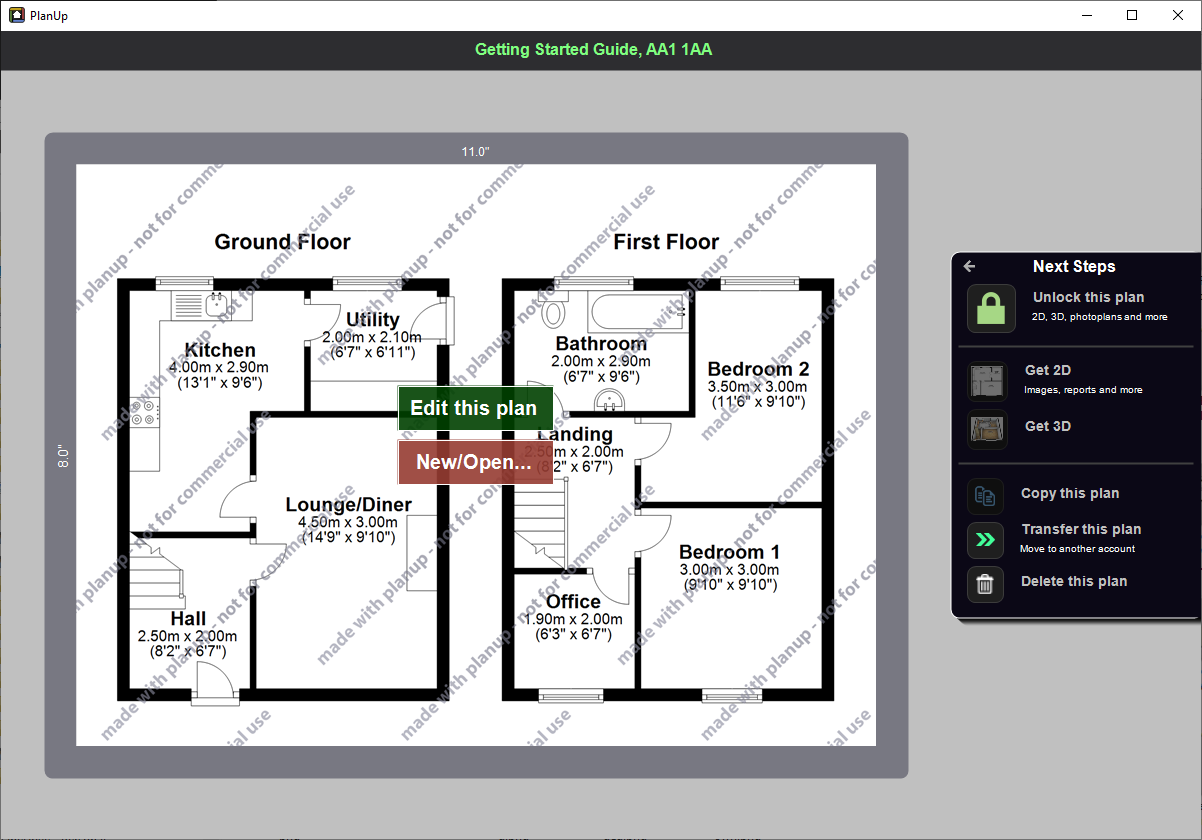
You will see options for:
- Edit this plan: Tap this to make amendments to your plan.
- New/Open…: Tap this to go back to the start screen of PlanUp where you can either start a new plan or to access a different plan.
- Unlock this plan: This will give you options to pay for the plan so you can then save any images or other files you need.
- Get 2D: This will allow you to customise and save the 2D images for the plan – this will only work once the plan has been unlocked.
- Get 3D: This will allow you to customise and save the 3D images for the plan – this will only work once the plan has been unlocked.
- Transfer this plan: This allows you to request to move the plan from your account onto your client’s account.
- Copy this plan: This opens a copy of the plan and prompts you to enter a new address straight away – once entered tap finish to ensure the new address is saved. This will only work once the plan has been unlocked.
- Delete: tapping this removes the plan from your list in PlanUp.
Unlocking the plan
Before you can save the images or any other files for use, you will need to remove the watermark.
To do this tap on Unlock this plan, and you will then see the options available for how to purchase the plan on a screen like this:
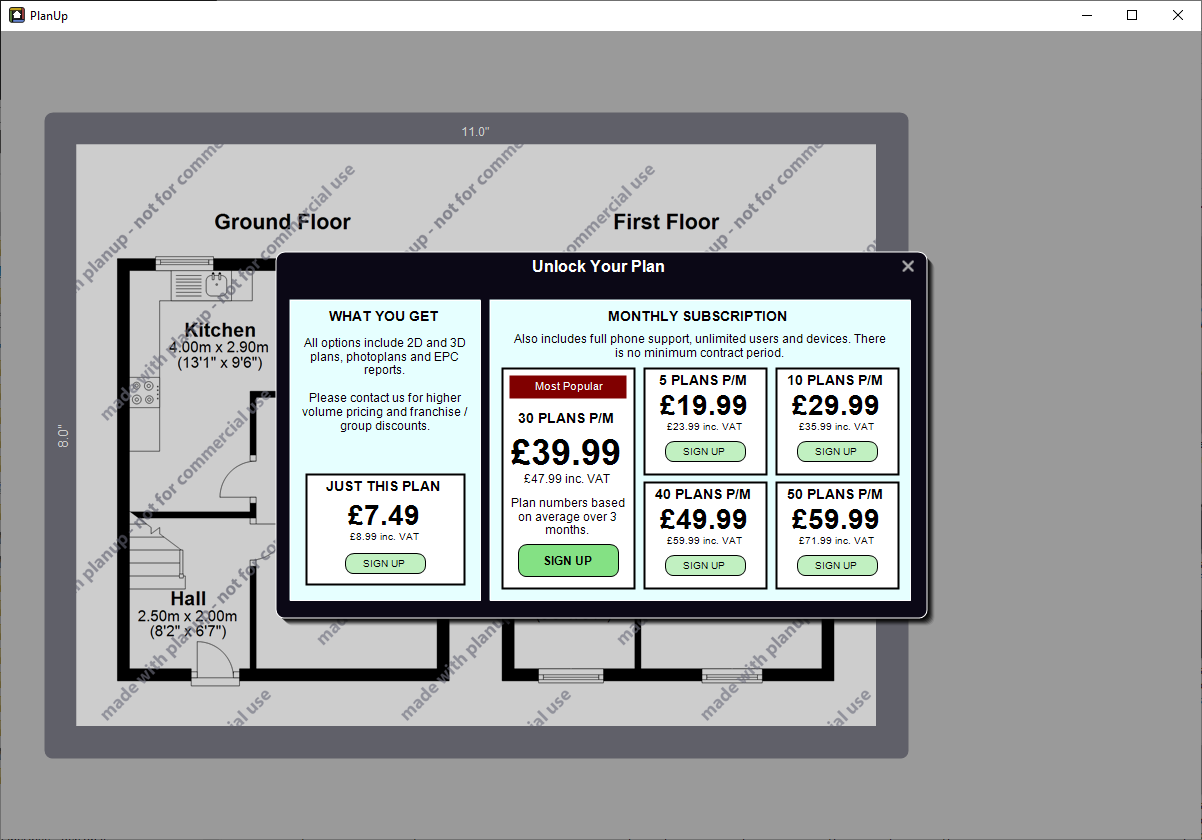
If you would like to discuss what options are available, please contact our team at sales@planup.co.uk or by calling 03458 678 222.
Once you have made your selection, please follow the prompts to complete payment as necessary.
Once completed, depending on the option you chose you may need to tap on Unlock this plan again to complete the process.
How to get images and other files
Once the plan has been unlocked, the screen will change slightly to look like this:
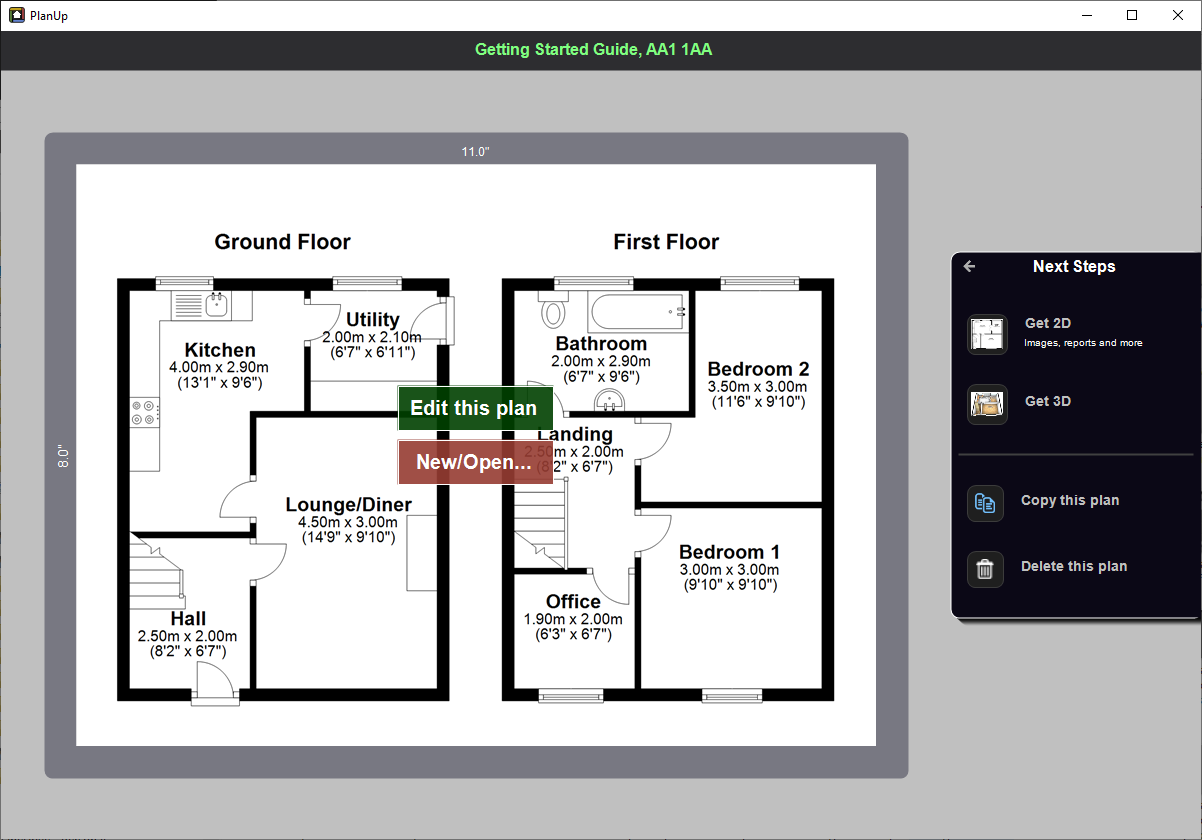
From here you can:
- Tap Edit this plan to make amendments to your plan.
- ap New/Open… to go back to the start screen of PlanUp where you can either start a new plan or open a different plan.
- Get 2D: This will allow you to customise and save the 2D images for the plan.
- Get 3D: This will allow you to customise and save the 3D images for the plan.
- Copy this plan: This opens a copy of the plan and prompts you to enter a new address straight away – once entered tap finish to ensure the new address is saved.
- Delete: Tapping this removes the plan from your list in PlanUp.
The option to Transfer this plan option is now located after tapping get 2D.
Get 2D
Once the plan has been unlocked you can tap on Get 2D to customise and save your 2D images.
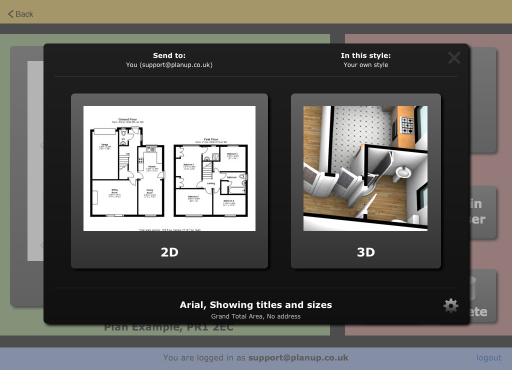
Once you have tapped on Get 2D you will see a screen like this:
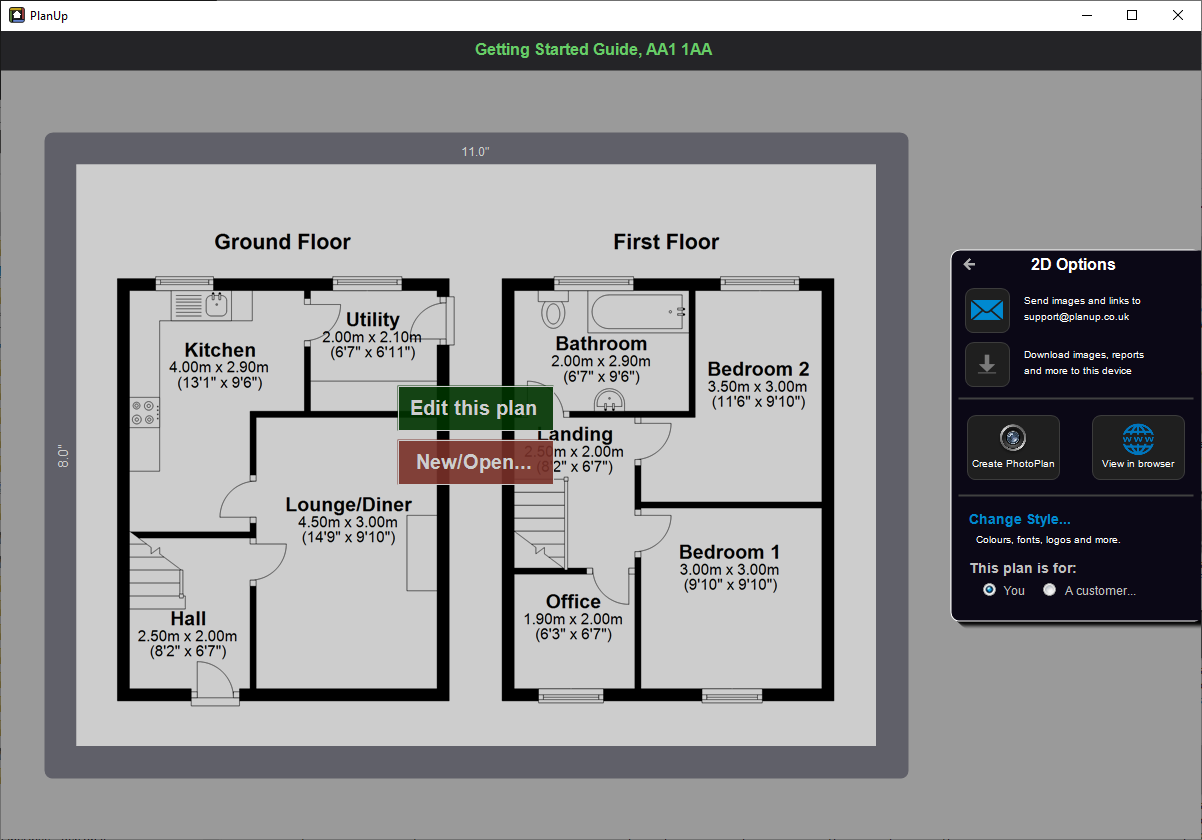
From here you can:
- Send images and links to the email you log in with. Simply tap on this and you will see a confirmation on screen when the email has been sent.
- Download the available files directly from the software (only available on desktop/laptop). Tapping on this will give you a series of links to download the available files and also give you a PlanUp ID for use with back-office software that allows integration:
="../images/Get2d-DirectSave.png" width="400"/>
- Create a PhotoPlan: add photos to an online viewer (only available on desktop/laptop).
- View in browser: opens the online viewer in your web browser.
- Change Style…: allows you to customise how your plan looks and save different styles for different customers.
- Choose a customer: if you want to send the images directly to the customer from PlanUp you can set them up here. This is another way you can save different styles for customers, but this doing this here means you can also send the images via PlanUp to your customer, or even send the customer a link they can use to customise the plan themselves. You can also transfer the plan to their own account if they have an active PlanUp subscription.
Change style...
On tapping Change style… you will see a screen like this:
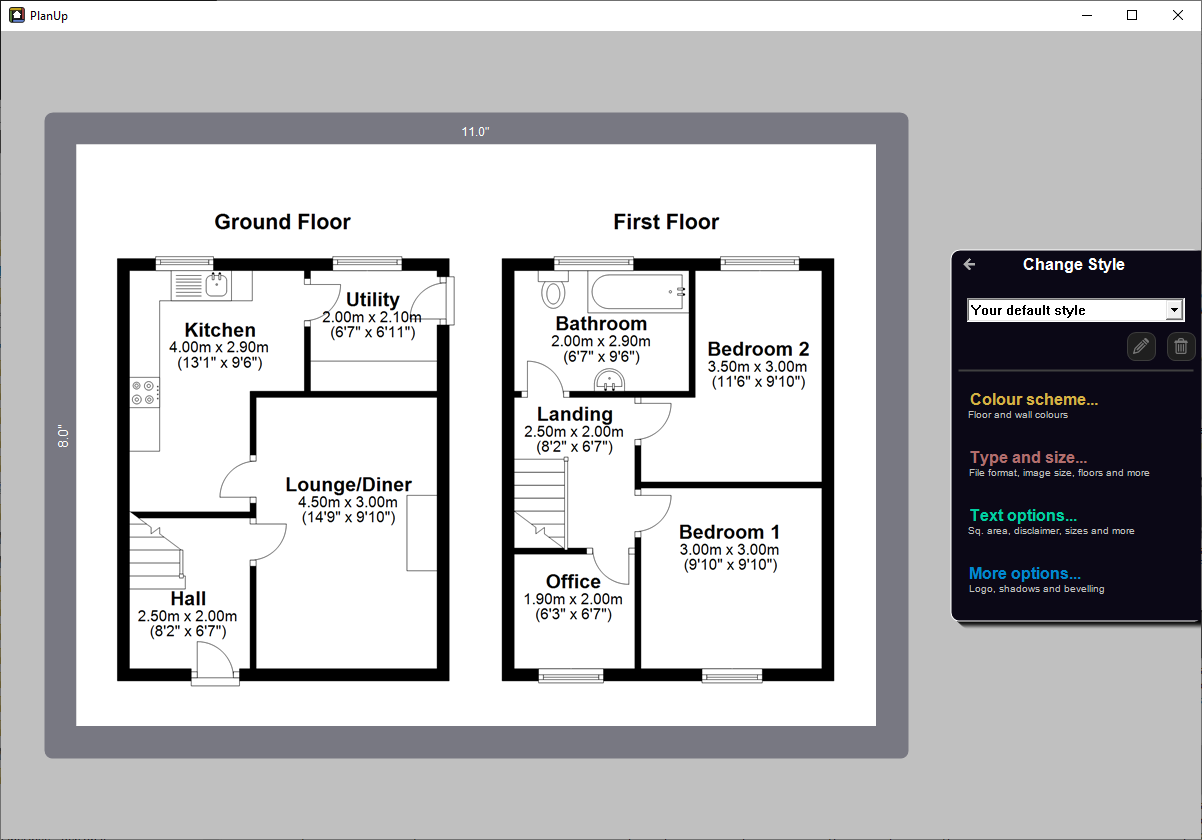
You can now:
- Set up new / select from saved styles for different customers/uses.
- Change the Colour scheme…
- Change the Type and size… of the image file to be saved.
- Change the Text options… for what/how it will be displayed.
- Select More options… to choose from a selection of other available options including adding a logo.
Set up new / select from saved styles
As well as setting your own default style, you can also save different styles for your customers so you can simply select the style to apply the saved settings to plans for that customer in the future.
New style
- Tap on the drop-down box (where it will currently say Your default style) and select New style…
- You will now be prompted to enter a name for the style.
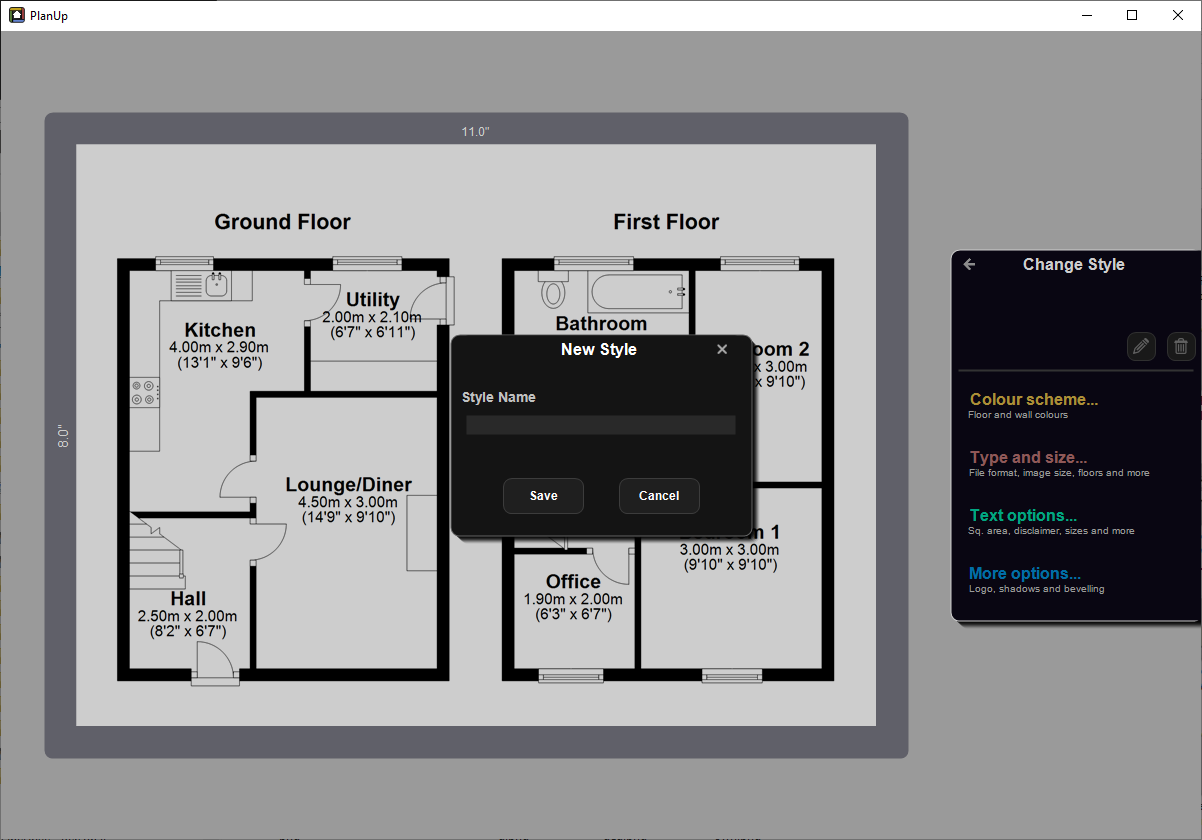
- Once you have entered the style name, tap Save. The drop-down box will now have the style name you just created and you can continue to set the style as required.
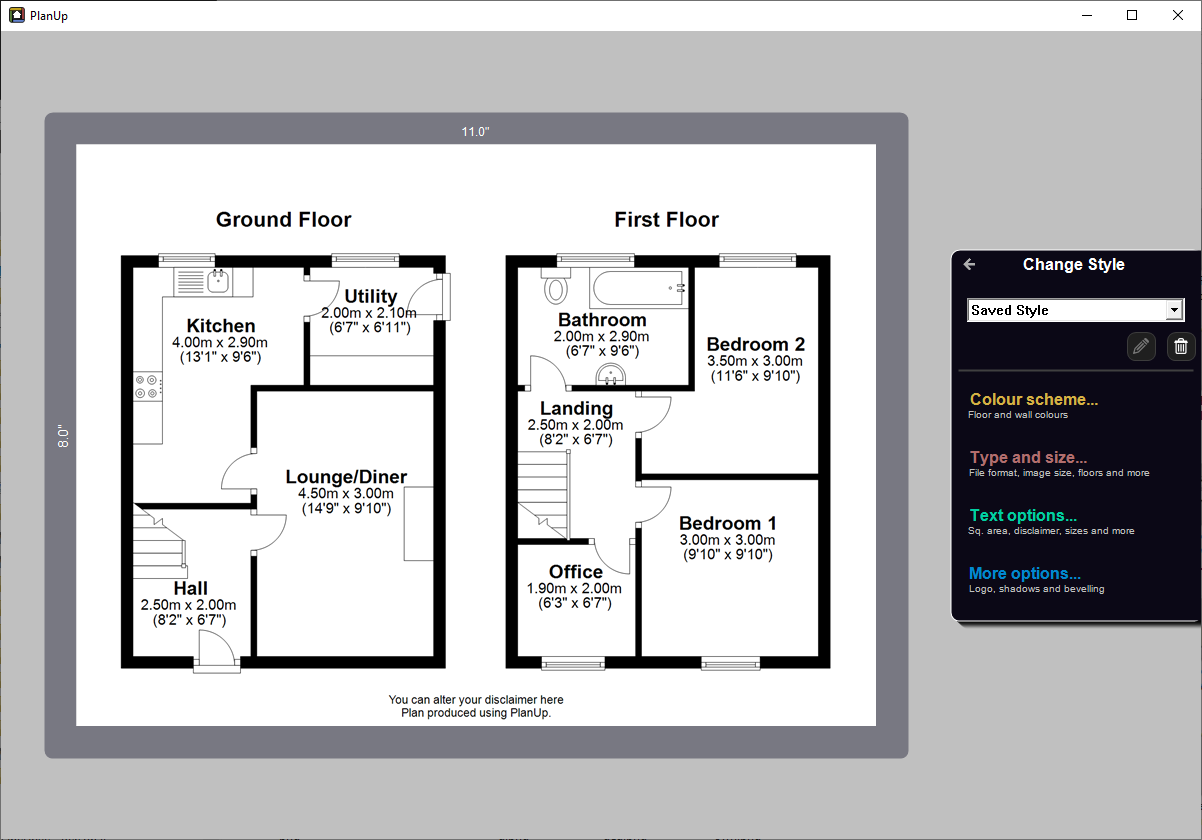
Select a saved style
Simply tap on the drop-down box (where it will currently say Your default style) and select the required style.
You will now see the preview change from your default style to the saved style.
Colour scheme...
When you tap on Colour scheme… the menu will change to look like this:
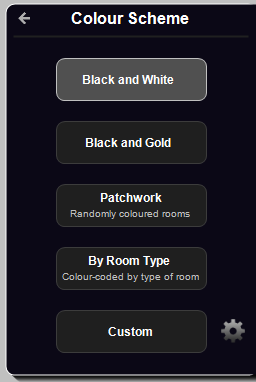
You can choose between:
- Black and White: Black walls with a white floor.
- Black and Gold: Black walls with a gold floor.
- Patchwork: Black walls with randomly coloured floors.
- By Room Type: Black walls with rooms coloured according to the type of room.
- Custom: Allows you to set your own colour for both walls and floor.
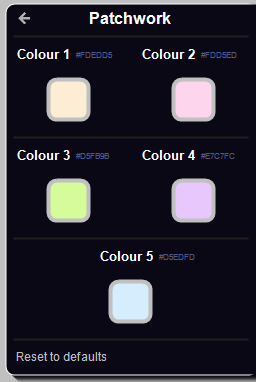
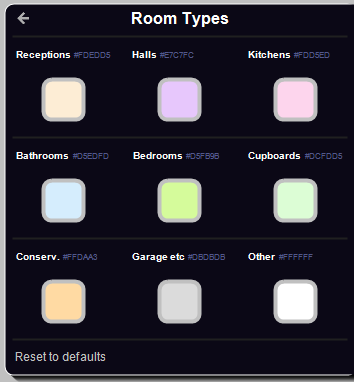
When you select Patchwork or By Room Type you will be given a screen with colour swatches for each grouping. Tapping on the colour swatch allows you to set a custom colour for this group. Alternatively if you have a hex code, you can tap on the hex code next to the group name and enter the code here.
Type and size...
When you tap on Type and size… the menu will change to look like this:
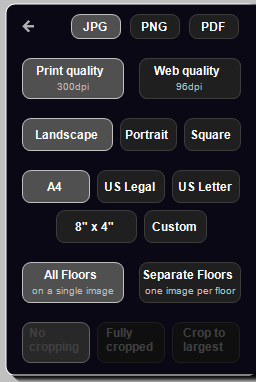
Here you can select:
- The file format (JPG, PNG, or PDF).
- The image quality - print (high res) or web quality (low res).
- Image orientation (landscape, portrait, or square).
- Image size (preset selection available or set your own custom size).
- Whether to have all floors on a single image, or each floor on a separate image.
- If you select to have separate images for each floor, you also have some options available to crop the empty white space from around the smaller floors.
Text options...
When you tap on Text options… the menu will change to look like this:
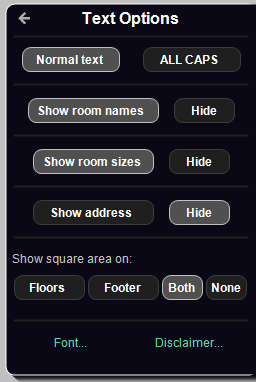
Here you can:
- Set the text to all capitals.
- Show/hide all room names.
- Show/hide all room sizes.
- Show/hide the plan address (first line only).
- Add a disclaimer.
More options...
When you tap on More options… the menu will change to look like this:
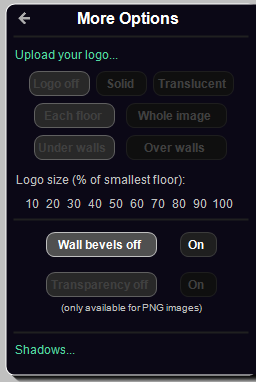
From here you can:
- Upload a logo. Once a logo has been uploaded you can change associated display options.
- Turn wall bevelling on/off (for wall bevelling to show, you will need to have the wall fill and line colours set to be different).
- Make the white surround of the plan transparent (this is only available if you have selected PNG in Type and size.
- Add shadows to the plan.
Choose a customer
Tap on A customer… and a pop up will appear asking you to Choose a customer from a drop-down list.
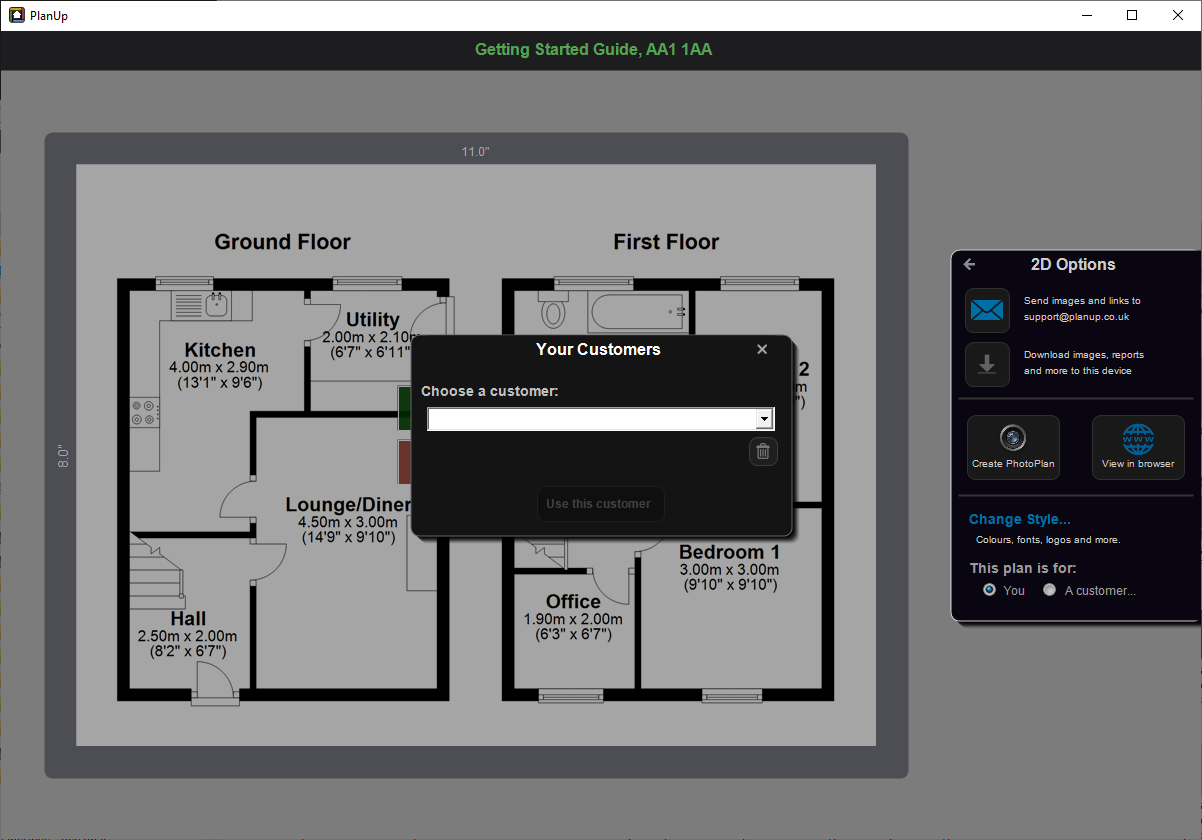
If you have not previously saved any customers or this is a new customer, select New customer… and you will then be prompted to enter the email and a name for the customer (the email address is required, the name is optional).
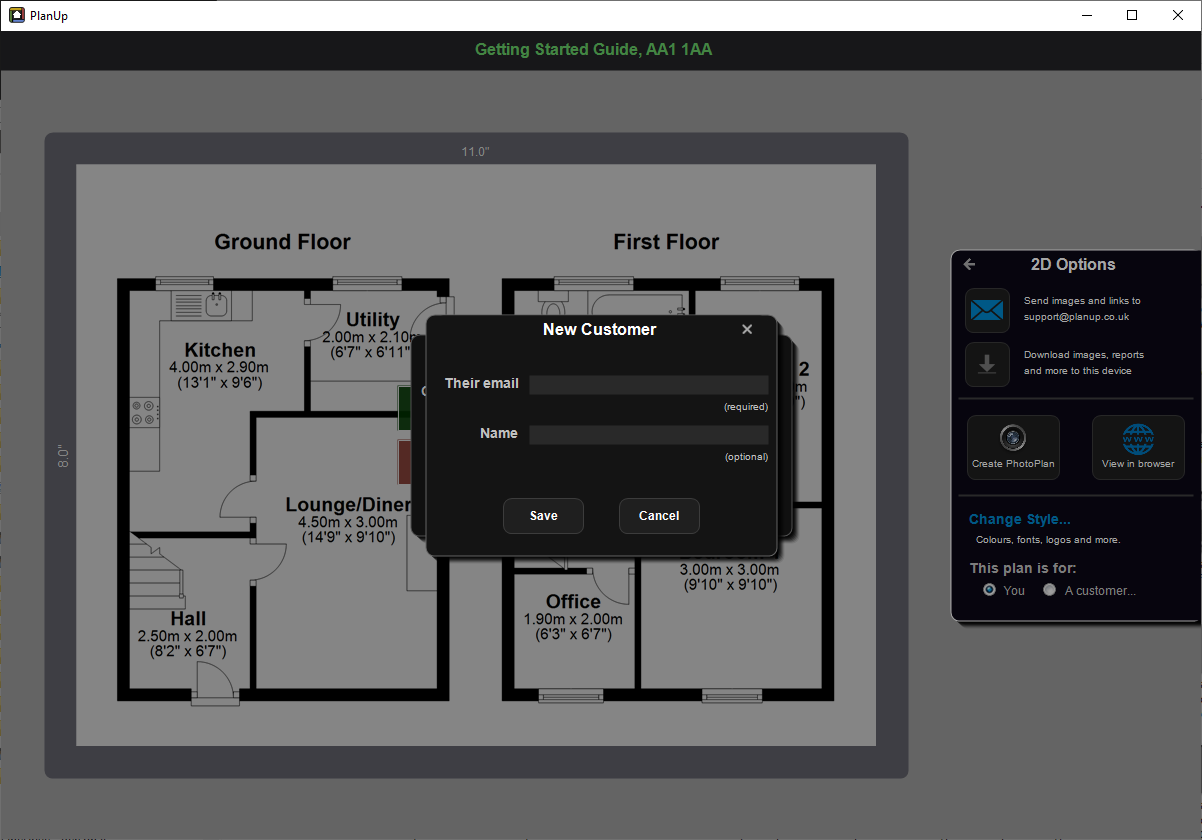
Once you have entered the details, tap Save.
If you have saved this customer previously, simply select their email from the drop and then tap Use this customer.
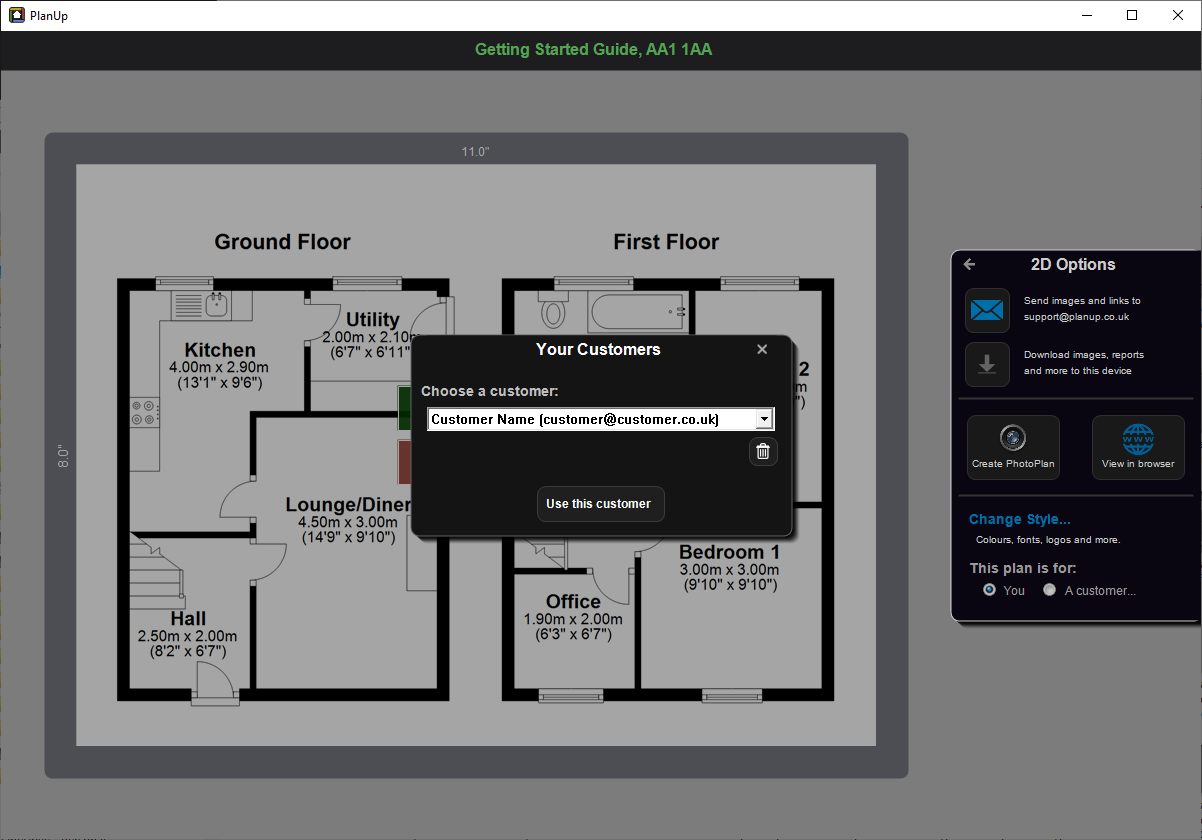
You will now see a screen like this:
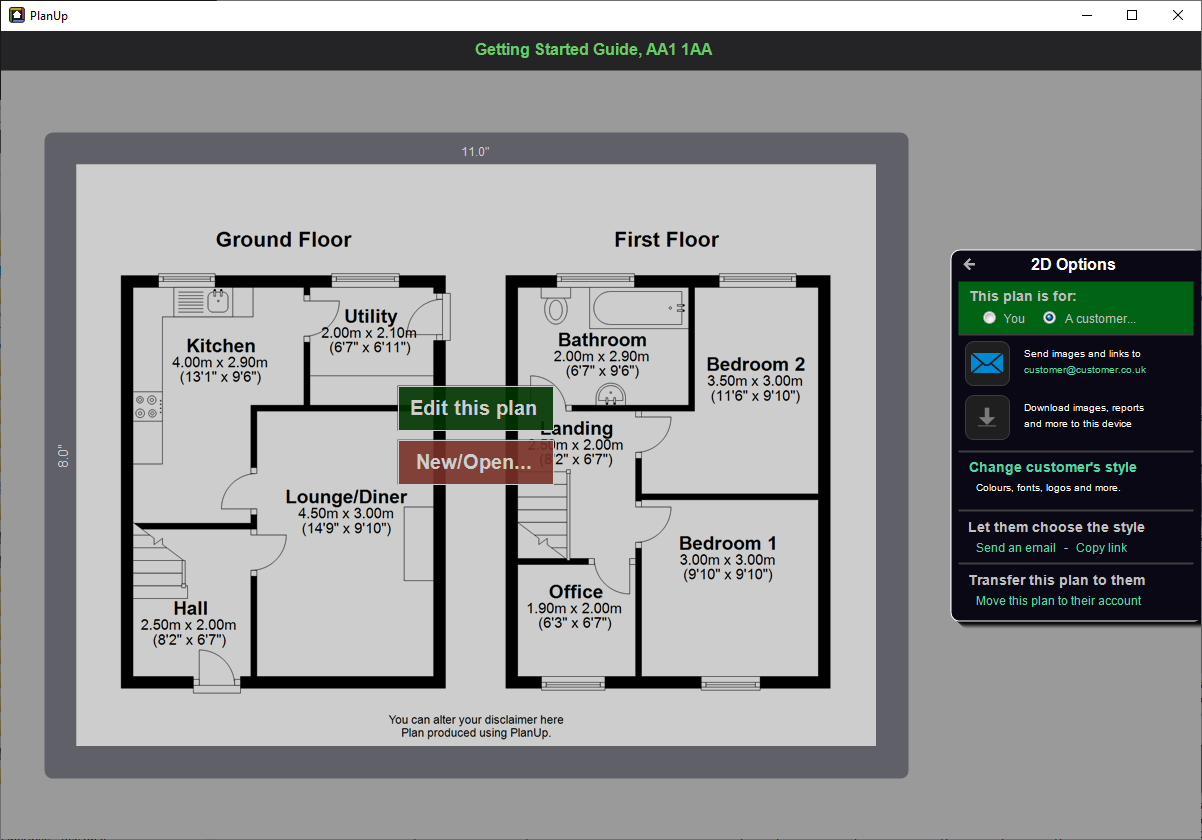
You can now:
- Send images and links to other files via email directly to the customer from PlanUp.
- Download the files from PlanUp to send on to the customer yourself.
- Change customer’s style. All of the same options as described previously in Change Style with the exception of adding new styles. Only one style can be saved on a customer’s record.
Let them choose the style: Send a link to the customer so they can customise how the plan looks themselves. Either Send an email with a link via PlanUp (to the email address you saved for the customer), or you can Copy link to send in an email yourself.
Transfer this plan to them: Use this option to send a request to transfer the plan onto your customer’s account with us.
Let your customer choose the style
Once you have chosen your customer, you will see a section in the menu panel to Let them choose the style:
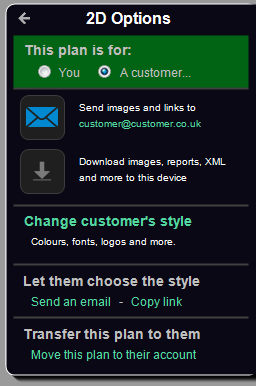
This allows you to send your customer a link so that they can set their own customisations, add their own logo, disclaimer, etc. Two options are available:
- Send an email: Sends an email via PlanUp to the email you saved for the customer record with a link to customise the plan as they wish; or
- Copy link: This copies the link the customer needs to customise the plan to your clipboard (the same link that is sent via PlanUp using Send an email above), so you can paste into an email from yourself rather than PlanUp.
If you use the Send an email option, your customer will receive an email like this:
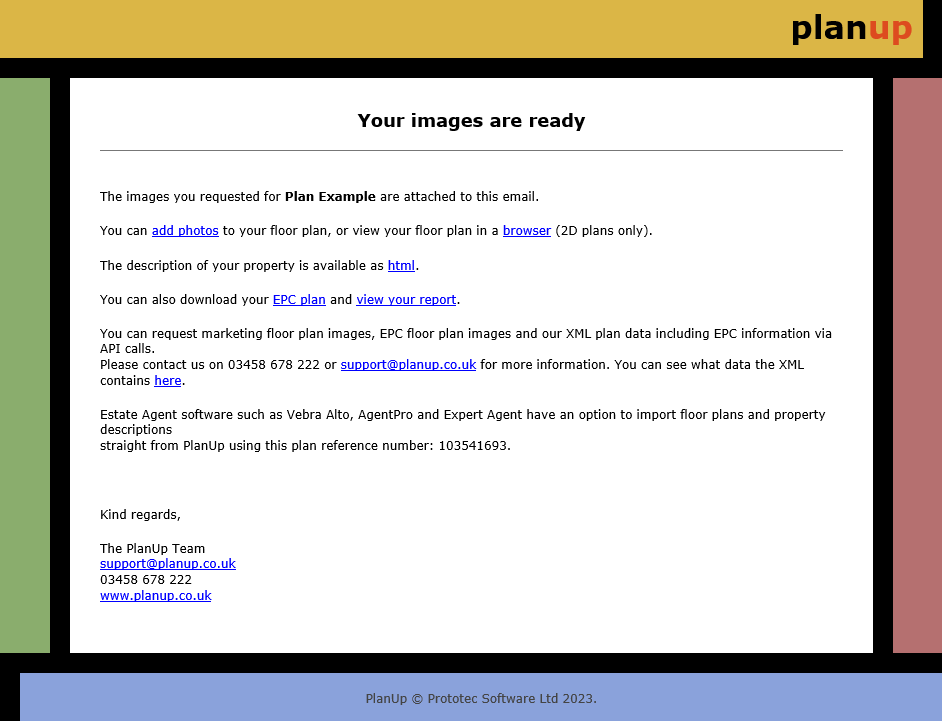
Once your customer has received the email sent from PlanUp or from yourself if you use the copy link option, they simply need to click on the link to be able to customise and save the plans as they wish. Instructions for how they can do this can be found in the document linked below:
Transfer this plan to your customer's account
Use this option to send a request to transfer the plan onto your customer’s account with us.
IMPORTANT:
- To use this option, your customer must have a monthly subscription with PlanUp as they will be paying for the transferred plan.
- Once the plan has been transferred you will not be able to access the plan as it will no longer be on your account.
If you wish to transfer the plan to your customer’s account with us, then tap on Move this plan to their account. This will show you a prompt asking you to confirm that you wish to transfer this plan. Once you have tapped on Yes, a message will be displayed saying an email has been sent to your customer’s email address – this must be the same email address they use to log in to PlanUp with.
Your customer will receive an email like that below informing them a plan has been drawn by you (stating the plan address and your email address), informing them that if they accept the plan this will be counted towards their monthly allowance.
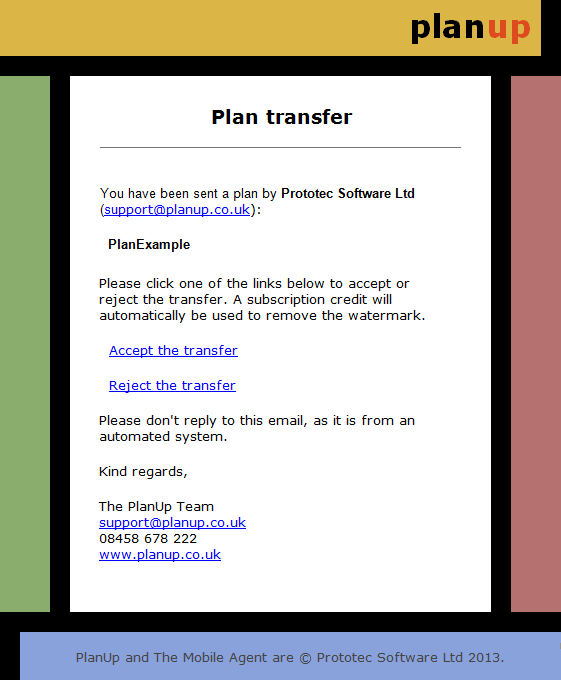
They will then have two links, one to accept the plan onto their account, and the other to reject it.
If they accept the plan, it will be moved from your account onto theirs (you will no longer be able to access the plan) and they can then continue as normal to save the plan as normal to make any amendments and save the plan as they wish.
If they decline the plan, it will remain on your account and they will not be able to work with the plan – if this was a mistake you will need to start the process again.
Get 3D
Once the plan has been unlocked you can tap on Get 3D to customise and save your 3D images.
Once you have tapped on Get 3D you will see a screen like this:
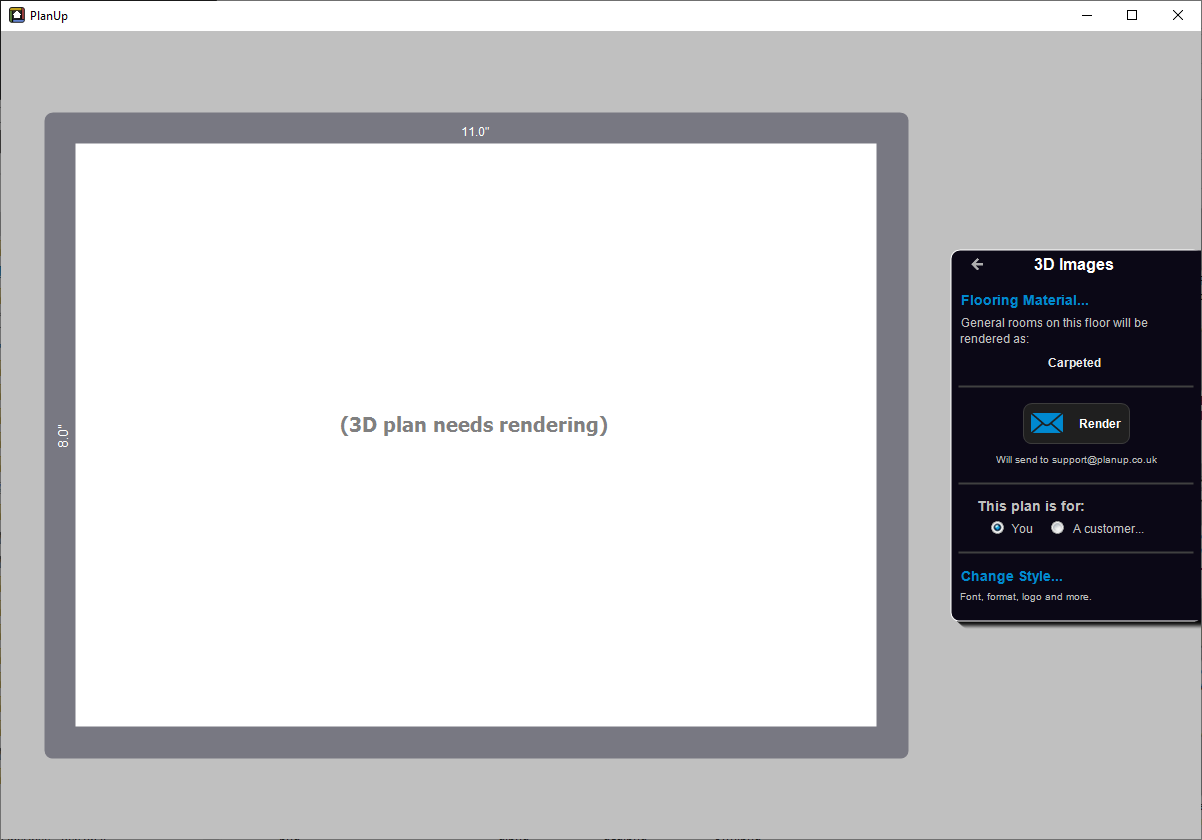
From here you can:
- Change the Flooring Material.
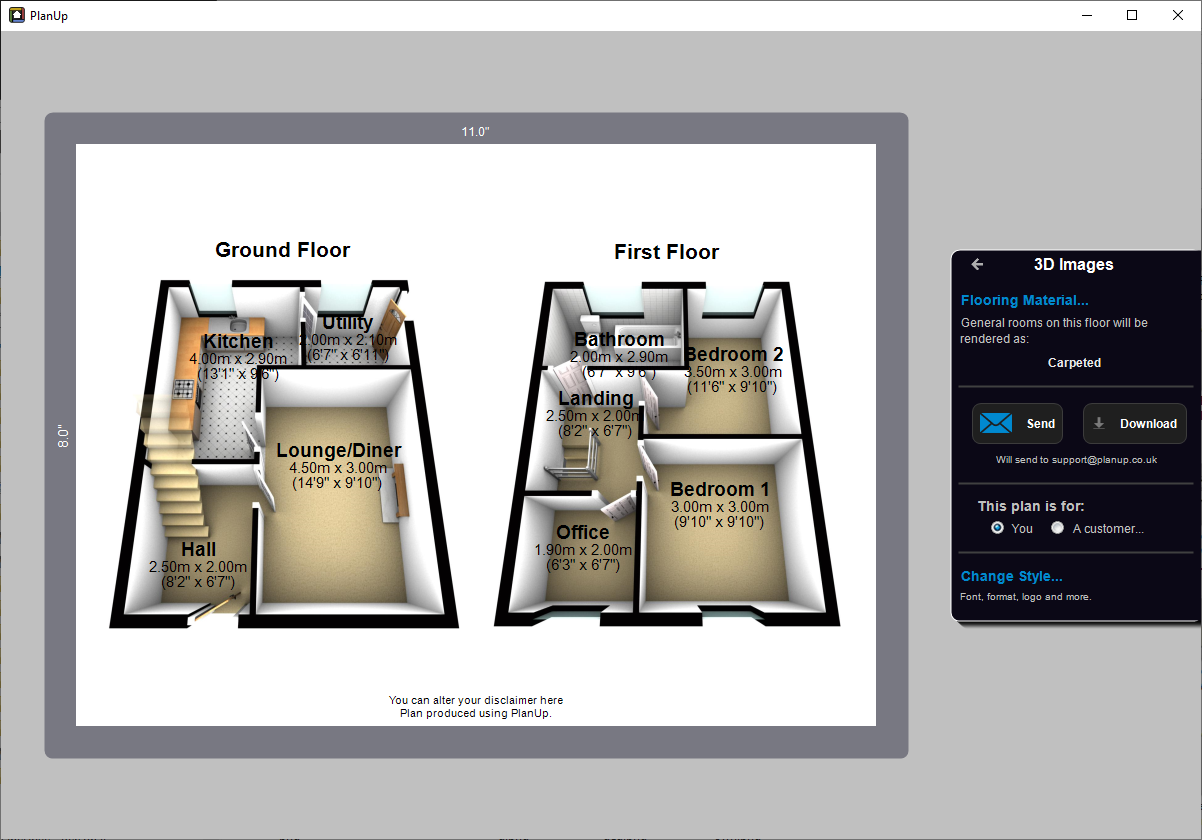
- Render the 3D image – an email with the image(s) attached will be sent to your log in email when it is complete, you will also then be able to download the image(s) directly from PlanUp.
- Choose A customer: This works in the same way as choosing a customer for 2D plans.
- Chamge Style...: This works in the same way as changin the style for the 2D plans, with the exception that you cannot change the colours as these cannot be changed for 3D plans.
Add photos
You can create interactive Photo Plans using PlanUp once you have finished drawing the normal plan.
Please note you need to add photos to a plan on a Windows PC or a Mac. You cannot add photos to plans using any other device.
Once you have finished drawing the plan tap on the Finish icon on the bottom toolbar, and enter the address and tap on OK.
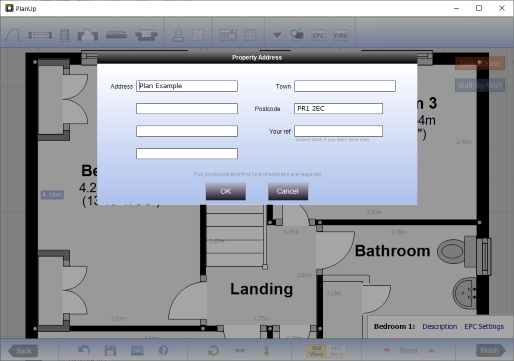
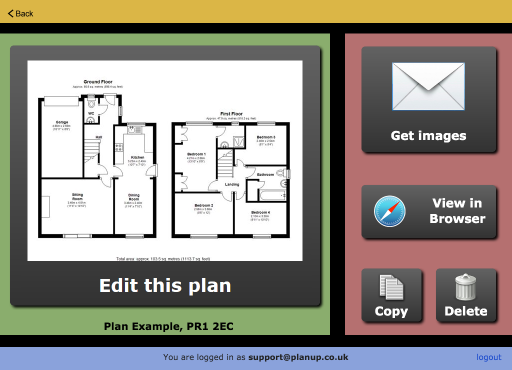
Now tap on Get images and on the following screen tap on 2D
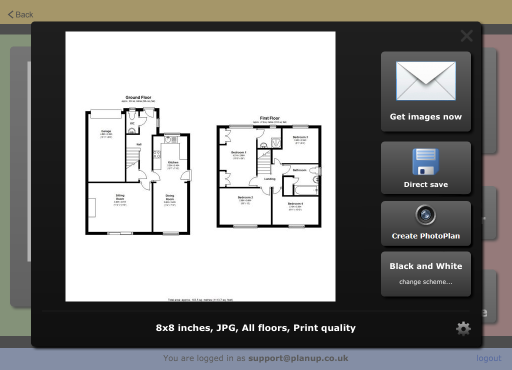
You will now see a button for create photo plans. Tap on this and a new window will open similar to the image shown below:
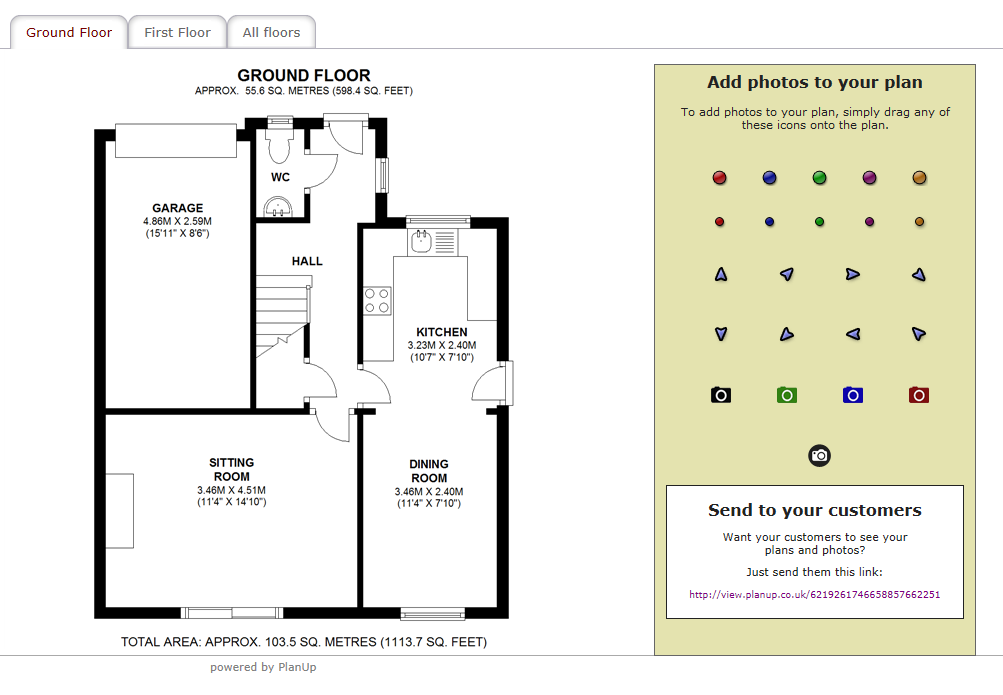
Select the hotspot you want to use from the panel on the right, and drag it onto the plan. This will then open the box shown below:
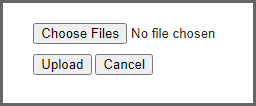
Tap on Add files which will allow you to navigate to the photos that you want to upload – please note only jpegs can be uploaded.
You can upload as many files at a time as you want to – a hotspot will be added to the right hand side of the image for you to drag into place when the images have been uploaded.
Once you have selected the file to upload tap ‘Start’ and the photos will upload showing you the progress.
Hotspots can be moved anywhere on plan by tapping and dragging on the hotspot.
If you need to replace any hotspot markers, select the replacement hotspot and drag and drop onto the marker you want to replace.
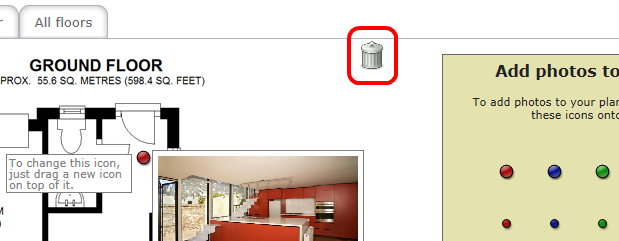
Should you need to delete a hotspot, tap and drag the hotspot to the bin which will appear in the top right hand corner of the plan window when hovering over / tapping on the hotspot as highlighted below:
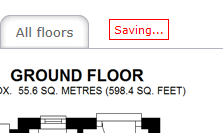
All changes made are saved as you work on the hotspots – you will see ‘Saving…’ displayed in red in a red box as illustrated below:
When you are finished the link to use on your website can be found at the bottom of the hotspot panel or by tapping on the view in browser link in the image email or in PlanUp.